Introduction
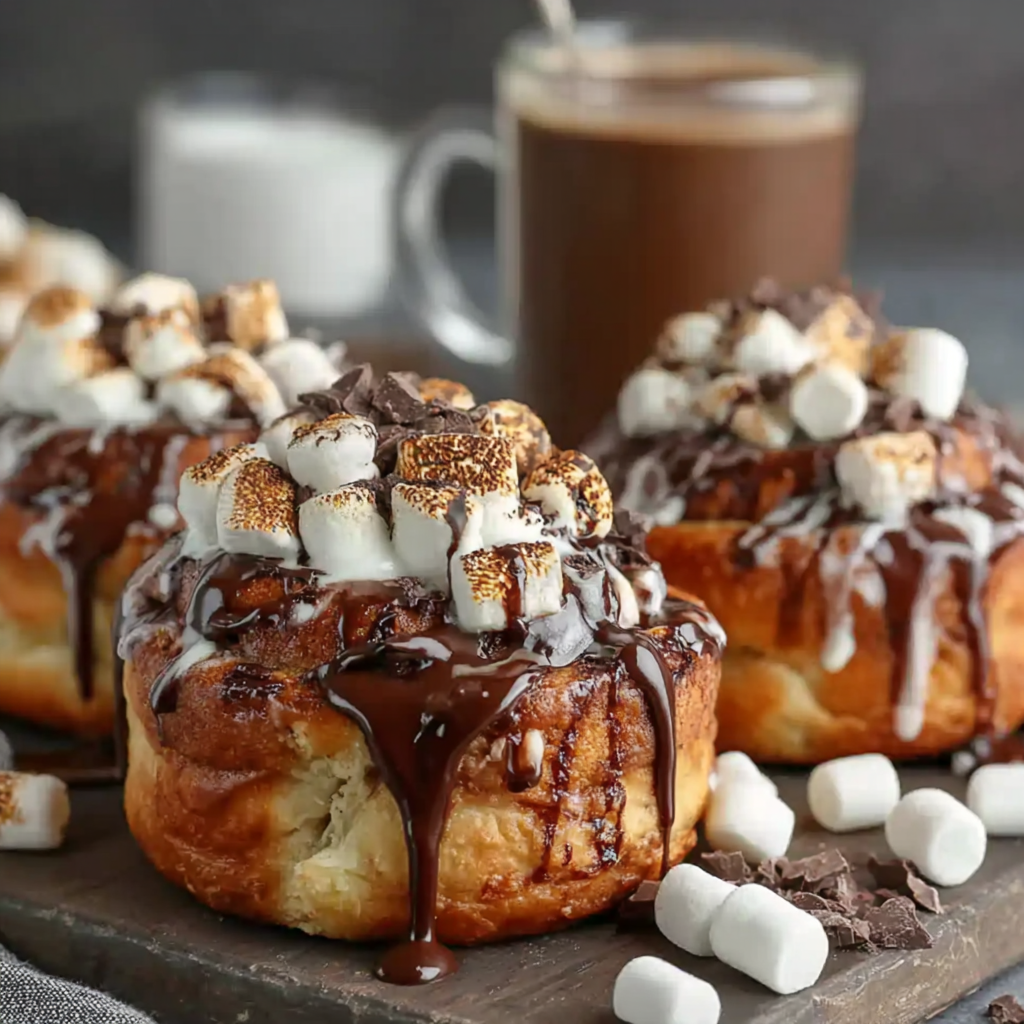
Cold days call for comforting treats, and what could be better than a warm, gooey cinnamon roll infused with the rich flavors of hot chocolate? These Hot Chocolate Cinnamon Rolls with Marshmallows combine the classic sweet treat with the cozy familiarity of your favorite winter beverage. Perfect for lazy mornings or festive gatherings, they offer a unique twist that will delight both friends and family alike.
This recipe brings together soft, cinnamon-spiced dough, rich hot chocolate, and melt-in-your-mouth marshmallows in a delightful swirl. As each roll bakes, the aroma fills your kitchen, transporting everyone who enters to a cozy, chocolaty haven. Whether drizzled with a warm chocolate glaze or served plain, these rolls are sure to impress and satisfy any sweet tooth.
Let’s dive into the deliciousness and discover how to make this irresistible treat that combines the warmth of cinnamon rolls with the luxurious taste of hot chocolate, crowned with fluffy marshmallows.
Ingredients
- 4 cups all-purpose flour
Flour forms the backbone of the dough, providing structure and stability. A higher protein content in bread flour can help achieve a chewier texture, but all-purpose flour works well for a softer roll. - 1 packet (2 1/4 tsp) active dry yeast
Yeast is the leavening agent needed to make the dough rise. It ferments sugars in the dough, creating carbon dioxide which allows the rolls to expand and become fluffy. - 1 cup whole milk, warmed
Milk adds moisture and richness to the dough. The warmth helps activate the yeast, aiding in a quicker rise and creating a tender roll. - 1/2 cup granulated sugar
Sugar sweetens the rolls and provides food for the yeast, promoting proper fermentation. It also contributes to browning during baking. - 1/2 cup unsalted butter, melted
Butter enhances flavor and contributes to the softness of the dough while providing richness. It also helps create a tender crumb in the finished rolls. - 2 large eggs
Eggs add structure and moisture, enriching the dough while also providing color and flavor. They help bind the ingredients together, contributing to a cohesive roll. - 1 teaspoon vanilla extract
Vanilla enhances the overall flavor profile, adding a warm, sweet aroma that complements the chocolate and cinnamon. - 1 teaspoon salt
Salt is essential to balance the sweetness and enhance flavor. It also helps control yeast activity, preventing over-fermentation. - 1/4 cup unsweetened cocoa powder
Cocoa powder infuses the dough with a rich chocolate flavor, mirroring the taste of hot chocolate. It also adds complexity to the overall flavor. - 3 tablespoons ground cinnamon
Cinnamon provides signature warmth and sweetness, contributing to the beloved cinnamon roll flavor. It pairs beautifully with chocolate. - 1 cup mini marshmallows
Mini marshmallows lend a fun, gooey texture and sweetness, reminiscent of marshmallows in hot chocolate, creating an exciting surprise in each bite. - 1/2 cup powdered sugar (for glaze)
Powdered sugar helps to create a smooth, sweet glaze that enhances the rolls. Incorporating it with milk or cream creates a lovely drizzle. - 2-3 tablespoons milk (for glaze)
Milk is mixed with powdered sugar to achieve the desired consistency for the glaze, ensuring it easily drizzles over the warm rolls.
Directions & Preparation
Step 1: Prepare the dough by mixing yeast and warm milk in a bowl.
Start by activating the yeast; combine the active dry yeast with warm milk. This mixture needs to sit for about 5-10 minutes until it becomes frothy, which indicates that the yeast is alive and ready to produce carbon dioxide, allowing the dough to rise effectively.
Step 2: In a large bowl, whisk together flour, sugar, cocoa powder, and salt.
Mixing the dry ingredients separately ensures the even distribution of cocoa, salt, and sugar. This step is crucial for flavor optimization in the final dough and for ensuring that other ingredients can blend in seamlessly.
Step 3: Mix in melted butter, eggs, and the yeast mixture until combined.
Incorporating the wet ingredients into the dry mixture creates a cohesive dough. The fats from the butter contribute moisture and enrich the rolls while eggs bind the ingredients together and improve the texture.
Step 4: Knead the dough until smooth and elastic, about 5-8 minutes.
Kneading develops gluten, essential for structure and chewiness. The dough should be smooth and elastic by the end of this process, and you can tell it's ready when it springs back when poked lightly.
Step 5: Let the dough rise in a warm place until doubled in size, approximately 1 hour.
This fermentation period allows the yeast to work its magic, creating air bubbles which will help the rolls become fluffy. Cover the dough to prevent drying out, and choose a warm, draft-free environment to encourage even rising.
Step 6: Prepare the filling by mixing cinnamon and sugar together in a bowl.
Creating the filling mixture early allows the cinnamon and sugar to combine evenly, ensuring that every bite has that classic cinnamon flavor balance. Use a generous amount for a dreamy, sweet swirl.
Step 7: Roll out the dough into a rectangle on a floured surface.
Rolling the dough creates a uniform thickness and ensures proper filling distribution when rolled up. Aim for about ¼ inch thickness and a rectangle shape to maximize your tight roll.
Step 8: Spread melted butter over the surface, followed by the cinnamon sugar mixture.
The melted butter acts as a glue to ensure the filling sticks to the dough. This step enhances flavor while ensuring the sugary and spiced filling adheres nicely for an even distribution.
Step 9: Sprinkle mini marshmallows evenly over the filling.
Adding marshmallows at this stage creates delightful pockets of gooey sweetness once the rolls are baked. Ensure they're spread evenly to give everyone a taste of that deliciousness.
Step 10: Roll the dough tightly from the long edge to form a log.
Rolling it tightly ensures a consistent shape and helps the rolls hold their form during baking. A firm roll also traps the filling and marshmallows within, creating a beautiful swirl.
Step 11: Cut the log into equal pieces, approximately 1 to 2 inches thick.
Even cutting ensures that all rolls bake uniformly. Use a sharp knife or a string to achieve clean cuts through the layers without squashing the roll, preserving the filling inside.
Step 12: Place the rolls in a greased baking pan and let them rise again for about 30 minutes.
Allowing the rolls to rise before baking helps develop their fluffy texture. During this second rise, the yeast continues to create air bubbles which expand in the oven, giving the rolls their final lift.
Step 13: Preheat the oven to 375°F (190°C).
While the rolls are rising, preheating the oven is paramount to ensure that they start baking immediately once placed inside. This helps achieve the perfect texture and promotes browning.
Step 14: Bake the rolls for 18-20 minutes, or until golden brown.
Baking the rolls at the right temperature is crucial for achieving that perfect golden-brown exterior and soft interior. Keep an eye on the rolls to avoid over-baking, which can dry them out.
Step 15: Prepare the glaze by mixing powdered sugar with milk until smooth.
Creating the glaze should result in a velvety texture that's neither too runny nor too thick. Adjust it by adding more milk or sugar to reach your preferred consistency for drizzling.
Step 16: Drizzle the glaze over warm rolls and serve immediately.
Applying the glaze while the rolls are warm helps it melt slightly and soak in, enhancing the flavor and adding a beautiful finish. Enjoying them fresh will provide the best experience of warm gooeyness with marshmallow surprises.

The Sweet Surprise Inside Each Roll
With mini marshmallows hidden in the swirls of warm cinnamon and chocolate, each bite delivers a delightful melty texture that contrasts perfectly with the soft, doughy exterior. This unexpected treat transforms the traditional cinnamon roll into something uniquely indulgent, capturing the essence of a cozy hot chocolate experience. Perfect for sharing, every roll is a cheerful enhancement to any festive breakfast or brunch.
The Role of Cocoa in Dough
Incorporating cocoa powder into the dough not only infuses it with rich chocolate flavor but also enhances its complexity. The bitterness of cocoa interacts beautifully with the sweet elements, elevating the typical cinnamon roll flavor and creating a more nuanced dessert. It beautifully pays homage to the beloved hot chocolate drink, developing a synesthetic experience where flavors and aromas blend in glorious harmony.
Tips for the Perfect Dough Texture
Achieving the ideal dough texture is crucial to the success of these rolls. Start by ensuring that all your ingredients are at room temperature; this allows for better incorporation of ingredients. Kneading until the dough is smooth and elastic provides the necessary gluten structure for chewiness. Additionally, the first rise should be in a warm environment to optimize yeast activity, ensuring the rolls are light and fluffy.
FAQs
Why are my cinnamon rolls too dry?
If your rolls are dry, it could be due to over-baking or not enough moisture in the dough. Always check them a few minutes earlier than the recommended time, as oven temperatures can vary.
How can I make these rolls less sweet?
To reduce sweetness, consider decreasing the amount of sugar in the dough and filling. You could also use dark cocoa powder instead of sweetened cocoa for a more intense chocolate flavor.
What should I do if the dough doesn't rise?
If your dough fails to rise, it could be due to inactive yeast, either from being expired or too hot/cold liquid during activation. Make sure to use fresh yeast and warm milk (not hot) to provide the right environment.
Can I substitute with gluten-free flour?
While you can use a gluten-free flour blend, be sure it has a binding agent like xanthan gum to mimic gluten's structure. The texture may differ slightly, but you can achieve good results.
How do I know when the rolls are finished baking?
The rolls are done when they are golden brown and have risen nicely. You can also give one a gentle press; it should feel set rather than gummy.
Is there a way to enhance the chocolate flavor?
For a richer chocolate flavor, consider adding chocolate chips or swapping some cocoa powder for melted chocolate in the dough, enriching the taste even further.
Can I make these rolls larger?
To make larger rolls, simply cut them thicker after rolling. Remember, larger rolls will require a longer baking time, so monitor them carefully.
How do I prevent the marshmallows from burning?
To avoid burning marshmallows, you may want to tuck them inside the roll rather than placing them on top before baking. They can then melt into the rolls without overcooking.
Conclusion
These Hot Chocolate Cinnamon Rolls with Marshmallows are not only a delicious treat but a joyful experience to create and share. The combination of chocolate, cinnamon, and marshmallow will transport you to warmer, cozier moments, making them a perfect addition to any gathering.
As you savor each roll, remember that the joy of cooking comes from the shared experience and the delightful memories made in the kitchen. Embrace the warmth of these lovely rolls during the cold weather and enjoy each soft, gooey bite.
Recipe Card
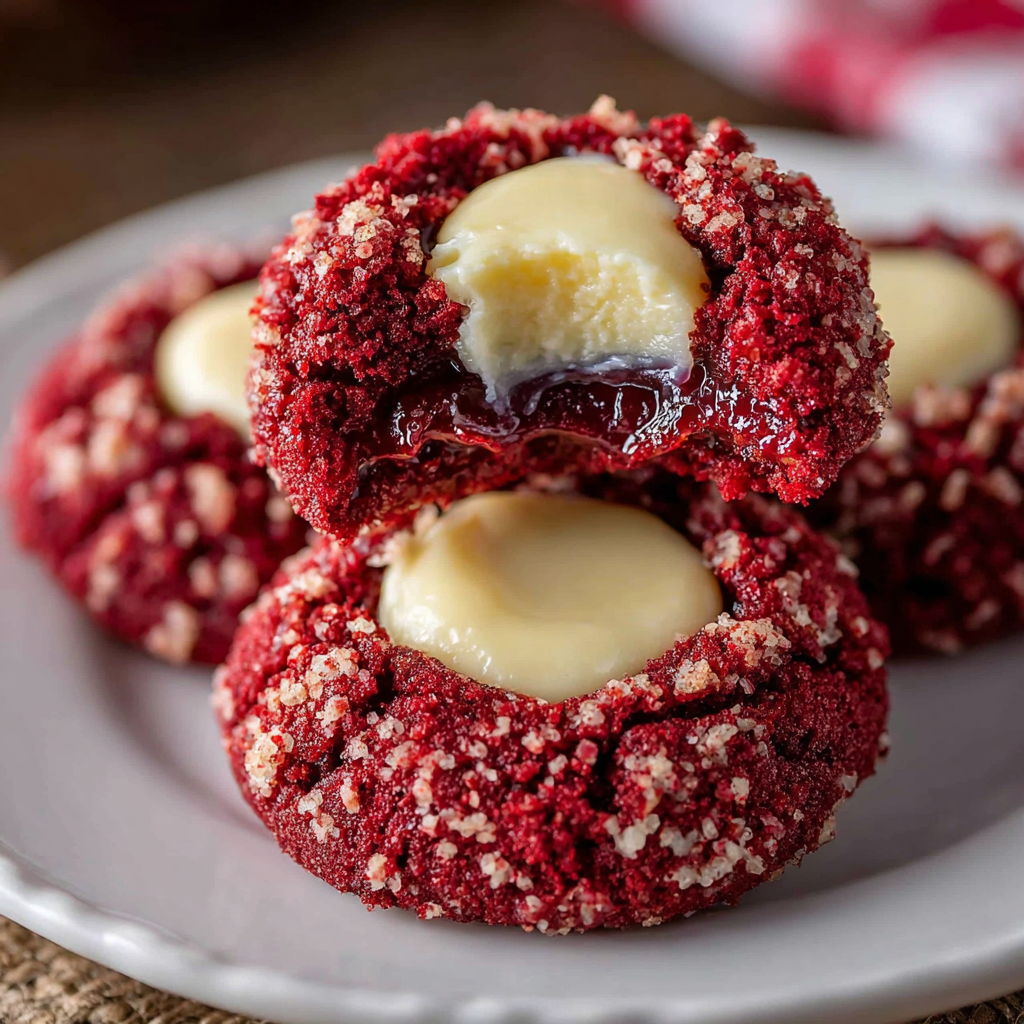
Deliciously Soft & Chewy Red Velvet Thumbprint Cookies
Ingredients
Method
- Preheat your oven to 350°F (175°C).
- In a mixing bowl, combine the flour, cocoa powder, baking powder, and salt.
- In another bowl, cream together the softened butter and granulated sugar until light and fluffy.
- Beat in the egg, milk, vanilla extract, and red food coloring until well combined.
- Gradually add the dry mixture to the wet, mixing until combined but not overmixed.
- Using a cookie scoop or tablespoon, drop dough onto a lined baking sheet, spacing them about 2 inches apart.
- Using your thumb or the back of a spoon, make an indentation in the center of each cookie.
- Bake the cookies for 10-12 minutes or until the edges are set.
- Allow the cookies to cool on the baking sheet for 5 minutes before transferring to a wire rack.
- Meanwhile, in a small bowl, combine softened cream cheese and powdered sugar until smooth.
- Once cooled, fill each cookie indentation with the cream cheese mixture.
- Serve and enjoy your delicious red velvet thumbprint cookies!