Introduction
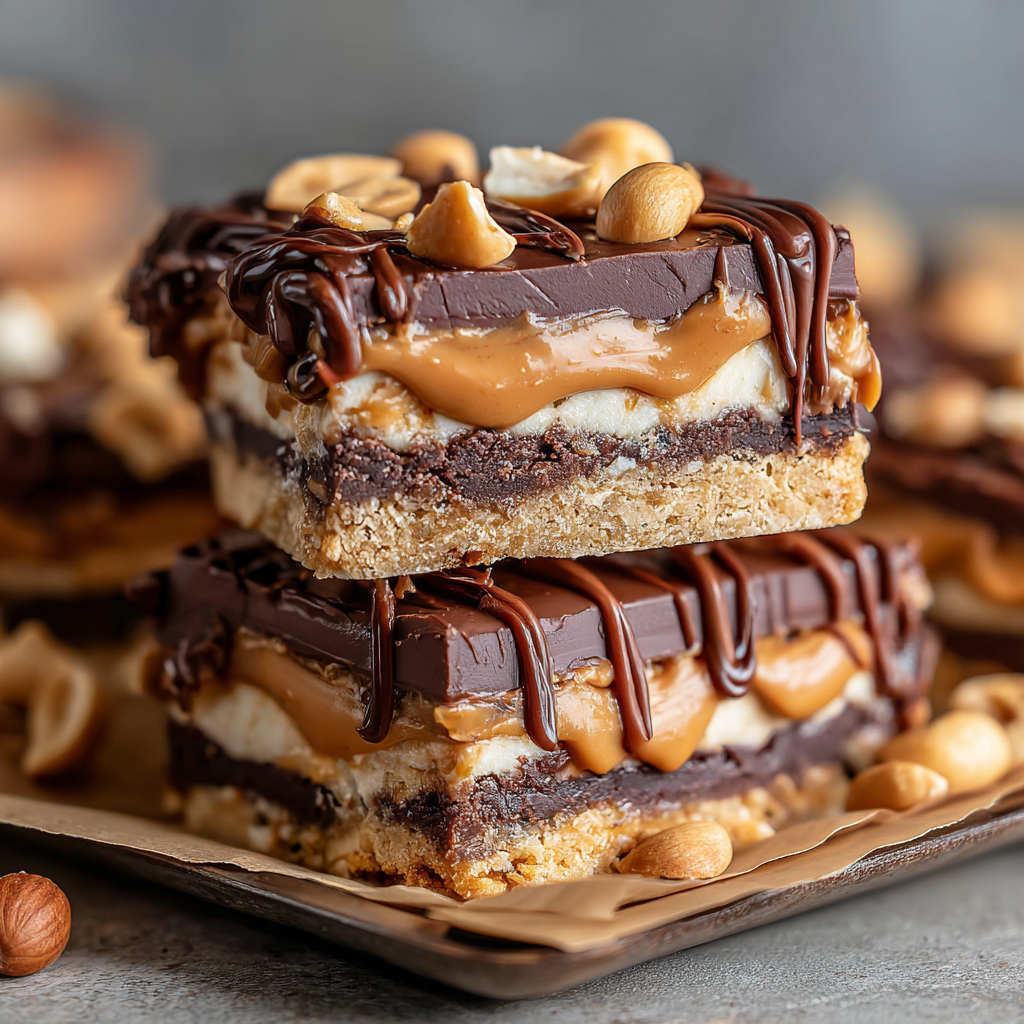
Chocolate Peanut Butter Dream Bars are the perfect indulgence for any occasion, combining the rich flavors of chocolate and creamy peanut butter into a delectable treat. With a smooth texture and a crunchy base, these bars strike a beautiful balance between sweet and salty, appealing to dessert lovers of all ages.
Whether you’re hosting a gathering, celebrating a special occasion, or simply treating yourself after a long day, these bars offer a delightful experience with every bite. Their no-bake nature makes them even more enticing, as they come together quickly without the need for any complicated baking steps.
Ingredients
- 1 ½ cups graham cracker crumbs
Graham cracker crumbs form the base of the bars, providing a sweet and slightly crunchy texture. They absorb moisture from the filling, holding the entire dessert together while giving it a sturdy structure. - ½ cup unsweetened cocoa powder
Cocoa powder gives the bars their rich chocolate flavor while also contributing to a dark, appealing hue. This ingredient enhances the overall taste profile and pairs beautifully with the creamy peanut butter. - 1 cup smooth peanut butter
Peanut butter adds creaminess and depth of flavor, making the bars rich and decadent. Its natural oils also help in binding the ingredients together, resulting in a luscious filling that complements the chocolate. - ½ cup powdered sugar
Powdered sugar is essential for sweetness and provides a smooth texture to the peanut butter layer without adding graininess. It blends easily, ensuring the filling is velvety and pleasurable to eat. - ½ cup unsalted butter, melted
Melted butter adds moisture and richness to the crust, helping to bind the graham cracker crumbs and cocoa powder together. It also contributes a flavorful element that enhances the overall taste of the bars. - 1 cup semi-sweet chocolate chips
Chocolate chips serve as the topping, offering a rich and melty layer that contrasts beautifully with the peanut butter. They shine with their delightful sweetness, completing the treat with a glossy finish. - 1 teaspoon vanilla extract
Vanilla extract adds a warm, aromatic flavor that enhances both the chocolate and peanut butter elements. It rounds out the sweetness, bringing harmony to the dessert.
Directions & Preparation
Step 1: Prepare the crust by combining graham cracker crumbs and cocoa powder.
Start by mixing the graham cracker crumbs with the unsweetened cocoa powder in a bowl. This blend will form the base of your bars, offering both crunch and a rich chocolate flavor. Make sure the dry ingredients are evenly mixed so that each bite has a consistent taste.
Step 2: Add melted butter to the crumb mixture and combine.
Pour the melted butter into the crumb mixture and stir until thoroughly combined. The butter acts as the binding agent, helping the crumbs adhere to one another. The mixture should resemble wet sand when ready, ensuring a firm crust when pressed into the pan.
Step 3: Press the crust mixture into the bottom of a lined baking pan.
Using your hands or the back of a measuring cup, firmly press the crust mixture into the bottom of a parchment-lined baking pan. This step is crucial; an evenly packed crust will provide the necessary structural support for the filling and ensure that it doesn't crumble.
Step 4: In a bowl, combine the peanut butter, powdered sugar, and vanilla extract.
In a separate bowl, blend together the smooth peanut butter, powdered sugar, and vanilla extract until creamy and well-combined. This mixture will serve as the luscious filling of your bars, so take your time ensuring that there are no lumps, resulting in a smooth texture that spreads easily.
Step 5: Spread the peanut butter mixture over the crust evenly.
Using a spatula, carefully spread the peanut butter mixture evenly over the cooled crust. Try to reach all corners of the pan to ensure that every piece will have that delicious filling. This layer provides a rich contrast to the chocolate topping and will be the star of each bite.
Step 6: Melt the chocolate chips and pour over the peanut butter layer.
In a microwave-safe bowl, melt the semi-sweet chocolate chips in short bursts until smooth. Pour the melted chocolate over the peanut butter layer, spreading it gently to cover the surface uniformly. The chocolate layer adds a glossy finish and a delightful sweetness that balances the salty peanut butter.
Step 7: Refrigerate until set, then cut into bars.
Place the pan in the refrigerator for about two hours or until the layers are firm to the touch. Chilling allows the chocolate to harden completely and the flavors to meld. Once set, use a sharp knife to cut into squares or rectangles, providing generous portions for sharing or indulging.

The Best of Both Worlds: Combining Chocolate and Peanut Butter
One of the most beloved combinations in dessert making is the classic pairing of peanut butter and chocolate. They complement each other remarkably well, with the creamy richness of peanut butter balancing the intensity of chocolate. This recipe exemplifies how these two ingredients can be layered to create a dessert that is not only visually appealing but incredibly satisfying in flavor.
No-Bake Convenience for Effortless Enjoyment
Why complicate things with baking when you can whip up these Chocolate Peanut Butter Dream Bars without turning on the oven? This no-bake recipe is a fantastic option for busy home cooks looking to deliver a standout dessert without the extra heat and hassle. Simply mix, layer, and chill—it's as easy as that!
Perfect for Any Occasion: From Snacks to Celebrations
Whether it’s a birthday party, a casual get-together, or simply a sweet treat for yourself, these bars are versatile enough to fit any occasion. Their visually appealing layers and delightful flavors make them a hit amongst both kids and adults. You can even personalize them with a sprinkle of sea salt or chopped nuts on top, taking them to another level.
FAQs
What should I do if my chocolate layer is too thick?
If the chocolate layer is too thick when pouring, try gently reheating it in the microwave for a few seconds until it's pourable again. Stir well to ensure it's evenly melted and smooth before spreading it over the peanut butter layer.
Can I add nuts to the peanut butter layer for extra crunch?
Absolutely! Chopped peanuts or any other nuts can be added to the peanut butter layer for an additional crunch. Fold them in gently to maintain the creamy texture while enhancing the flavor profile of the bars.
What if my crust is too crumbly?
If your crust is too crumbly and not holding together, it might need a bit more melted butter. Try adding a tablespoon at a time until it reaches the right consistency for pressing into the pan.
Can I use crunchy peanut butter instead of smooth?
Yes, crunchy peanut butter can be used in place of smooth for a different texture. It will add delightful bits of peanut throughout and give an extra layer of complexity to the bars, but ensure that it blends well with the powdered sugar.
How can I adjust the sweetness if it's too sweet for my taste?
If you find the bars too sweet, you can reduce the amount of powdered sugar in the peanut butter layer. Start with half the amount and adjust according to your taste preferences before mixing it in.
Can I use a different type of chocolate for the topping?
Certainly! You can substitute semi-sweet chocolate with dark chocolate for a richer, more intense flavor, or use milk chocolate for a sweeter topping. Just keep in mind that the flavor profile will change slightly with each type.
Conclusion
Chocolate Peanut Butter Dream Bars are a fantastic way to impress friends and family with minimal effort. Their delightful layers promise rich flavors while remaining simple enough for even novice bakers to conquer. Every bite becomes a celebration of the beloved chocolate-peanut butter union that many adore.
So what are you waiting for? Gather your ingredients, unleash your inner chef, and enjoy these blissful bars. Perfect for any occasion, these treats will have everyone coming back for seconds.
Recipe Card

Creamy White Chocolate Raspberry Cheesecake Bars
Ingredients
Method
- Preheat the oven to 325°F (163°C) and line a baking pan with parchment paper.
- In a medium bowl, combine graham cracker crumbs, cocoa powder, sugar, and melted butter.
- Press the mixture firmly into the bottom of the prepared pan, creating an even layer.
- Bake the crust for 10 minutes, then remove from the oven and let cool.
- In a large bowl, beat the cream cheese until smooth, then gradually add white chocolate and sugar.
- Add eggs one at a time, mixing well after each addition, then stir in vanilla extract.
- Gently fold in the fresh raspberries, being careful not to crush them.
- Pour the filling over the cooled crust and spread it evenly.
- Bake for 25-30 minutes until the edges are set but the center still jiggly.
- Let cool completely in the pan before refrigerating for at least 4 hours.
- Use the parchment paper to lift the bars out of the pan and cut into squares.
Notes
Additional serving suggestions: pair with a crisp salad, garlic bread, or roasted seasonal vegetables for balance.
For make-ahead, prep components separately and assemble just before heating to preserve texture.
Taste and adjust with acid (lemon/vinegar) and salt right at the end to wake up flavors.