Introduction
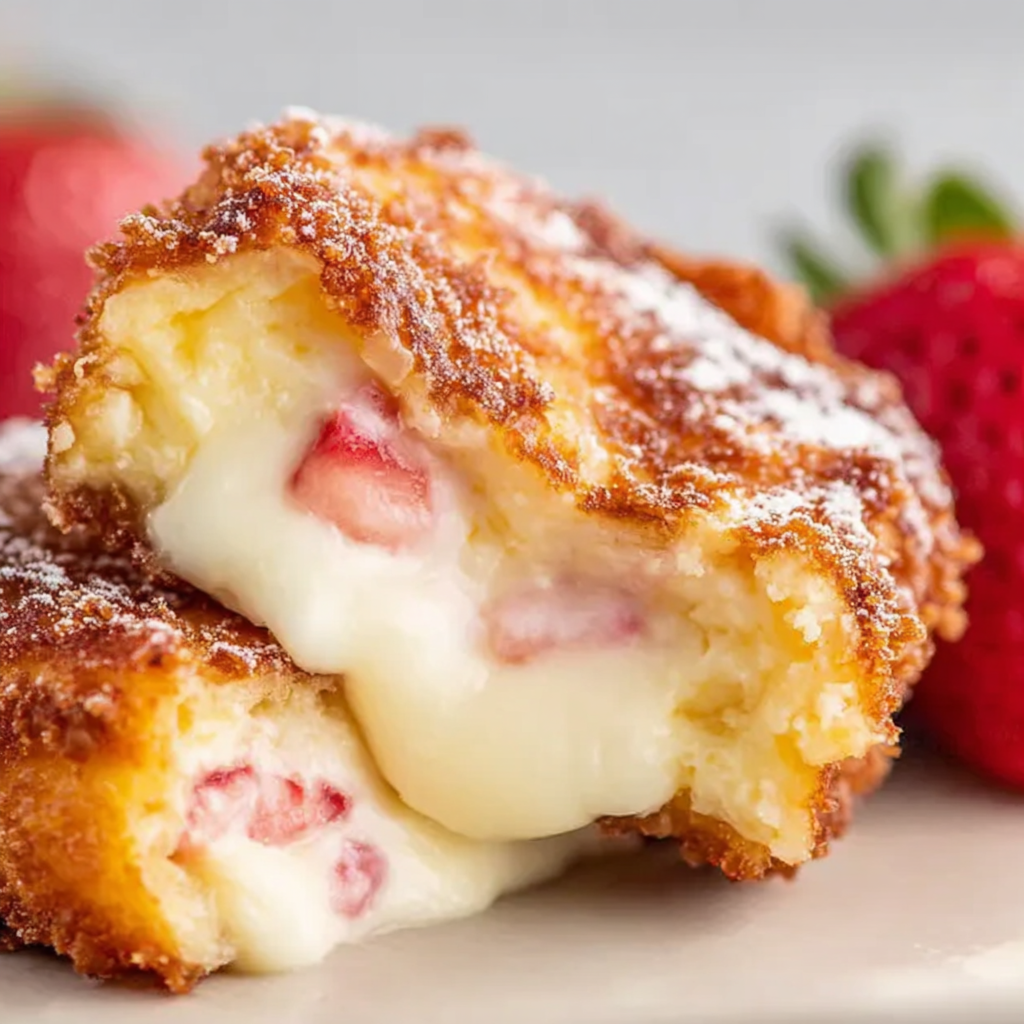
Deep fried cheesecake is a luscious treat that transforms one of your favorite desserts into a crispy, decadent indulgence. The contrast between the crunchy exterior and the velvety cream cheese filling is simply irresistible, making it perfect for special occasions or a delightful weekend indulgence.
Incorporating this unique dessert into your culinary repertoire not only impresses your friends and family but also gives you a chance to explore playful flavors and textures. The rich cheesecake, enveloped in a golden crust, is sure to elevate any gathering or celebration.
Whether you’re serving it at a party or treating yourself to a sweet surprise after dinner, learning to create deep fried cheesecake at home is easier than you think. With just a few pantry staples and some frying skills, you can embark on an indulgent journey that will tantalize your taste buds.
Ingredients
- 8 oz cream cheese, softened
The core of our cheesecake filling, cream cheese provides a rich, tangy flavor that is quintessential in cheesecake recipes. Its creamy texture is key to achieving that velvety mouthfeel we crave. - 1/2 cup sugar
Sugar sweetens the cheesecake, balancing the tanginess of the cream cheese and enhancing its flavor. It also helps in achieving that smooth consistency in the filling. - 1 teaspoon vanilla extract
Vanilla extract adds warmth and depth to the flavor profile, complementing the cream cheese beautifully. It elevates the overall taste experience of the cheesecake. - 1 large egg
The egg acts as a binder, helping to hold the cheesecake mixture together. It also contributes to the structure and adds moisture for a richer texture. - 1 cup all-purpose flour
All-purpose flour forms the backbone of the batter that coats the cheesecake. It creates a crispy texture when fried, making every bite delectably crunchy. - 1 teaspoon baking powder
Baking powder helps the batter to puff up slightly during frying, contributing to a lighter and crispier coating that contrasts nicely with the creamy filling. - 1/2 cup milk
Milk adds moisture to the batter, ensuring that the coating is neither too thick nor too dry. It plays a crucial role in creating a smooth batter that adheres to the cheesecake. - 1/2 cup breadcrumbs
Breadcrumbs provide an additional layer of crunch to the enclosing batter, enhancing the texture and contributing to a satisfying crunch when biting into the cheesecake. - Oil for frying
Oil is essential for deep frying, creating a hot environment that cooks the batter quickly and evenly. The right oil will give your cheesecake a beautifully golden-brown finish.
Directions & Preparation
Step 1: Prepare the cheesecake filling.
Start by beating the softened cream cheese in a mixing bowl until smooth. Gradually add the sugar, vanilla extract, and egg, mixing until well combined. This step is crucial as it helps achieve a smooth and uniform filling, ensuring that none of the cream cheese remains lumpy. Take your time to blend everything fully for a delightful creamy taste in your final product.
Step 2: Chill the cheesecake filling.
Once combined, cover the mixture and refrigerate for about 1-2 hours to firm up. Chilling not only enhances the flavors as they meld together but also makes it easier to scoop and shape the filling into bite-sized pieces. This step is critical for maintaining the integrity of the cheesecake as it undergoes frying.
Step 3: Shape the cheesecake into balls.
After chilling, use a small scoop or your hands to form the cheesecake mixture into 1-2 inch balls. Make sure to work quickly to prevent them from melting; this will help maintain their shape during frying. Crafting uniform balls will yield even cooking results and a consistent eating experience.
Step 4: Prepare the batter.
In a separate bowl, whisk together the flour, baking powder, and milk until smooth. This batter will serve as the crispy coating for your cheesecake. The consistency should be thick enough to coat the cheesecake balls without being too clumpy, so adjust the milk slowly as needed to achieve the perfect texture for frying.
Step 5: Heat the oil.
In a deep pot or fryer, heat the oil over medium-high heat until it reaches 350°F (175°C). It's essential to maintain the right temperature for the oil to ensure the batter fries quickly without soaking up excess oil. Using a thermometer can help you monitor the oil temperature accurately, leading to crisply fried cheese cakes.
Step 6: Dip cheesecake balls in batter.
Carefully dip each cheesecake ball into the batter, ensuring it is fully coated. Allow any excess batter to drip off before placing it into the hot oil. Properly coated cheesecake will create an outer layer that becomes crispy in the fryer, bringing a delightful crunch to contrast with the creamy filling.
Step 7: Fry the cheesecake balls.
In batches, carefully lower the batter-coated cheesecake balls into the hot oil. Fry each batch for about 2-3 minutes, turning occasionally until they are golden brown. Keeping the batches small allows the temperature of the oil to remain consistent, preventing soggy or unevenly cooked cheesecake bites.
Step 8: Drain excess oil.
Using a slotted spoon, carefully remove the fried cheesecake balls from the oil and place them on a paper towel-lined plate. Letting them drain for a minute or so will help remove any excess oil, ensuring your dessert is not greasy but rather light and crisp.
Step 9: Serve warm, dust with sugar.
Dust the fried cheesecake with powdered sugar before serving. This final touch not only adds visual appeal but also enhances the sweetness, making each bite of this decadent treat absolutely delightful. Serve immediately to enjoy the contrast of hot filling and crispy coating.

The Secret to Perfect Cheesecake Consistency
Achieving the perfect consistency for your cheesecake mixture is vital for a successful outcome. Beating the cream cheese to a smooth texture before adding sugar, vanilla, and egg ensures that there are no lumps that could affect the fryability. Maintaining a balance between creaminess and thickness will allow your cheesecake filling to maintain its integrity while being deep-fried.
Finding the Right Frying Oil
Choosing the appropriate oil for frying is essential in producing the perfect deep-fried cheesecake. Oils with high smoke points, such as vegetable or canola oil, are ideal, as they can withstand high temperatures without burning. This results in a crispy coating that is beautifully golden without compromising the flavor of your cheesecake.
Exploring Flavor Variations
Feel free to experiment with flavorings in your cheesecake filling to make this treat your own. Adding citrus zest, chocolate chips, or even a swirl of fruit preserves can create exciting taste variations. Personalizing your recipe allows you to adjust the sweetness and flavor profile, making each batch unique and fun.
FAQs
What if my cheesecake filling is too runny?
If your cheesecake filling is too runny, make sure to chill it longer before shaping. Alternatively, you can add a tablespoon of flour to thicken it up slightly.
What should I do if the batter is too thick?
If the batter becomes too thick, gradually add a bit more milk, whisking until you achieve a pourable consistency that will adequately coat the cheesecake balls.
What if my fried cheesecake bursts while frying?
If your cheesecake bursts, it may indicate that the filling was too warm or the batter was too thin. Ensure you chill the filling adequately and provide a thick enough coating during frying.
Can I make a larger batch for a party?
Absolutely! You can double or triple the ingredients to create a larger batch. Just ensure you fry in smaller batches to maintain oil temperature and consistent cooking.
What flavors can I add to the batter?
You can add various flavors to the batter, such as cinnamon or nutmeg, to enhance the overall dessert experience. Experimenting with vanilla or chocolate can also complement the cheesecake filling beautifully.
How can I tell when the fried cheesecake is done?
The fried cheesecake should be golden brown and should float in the oil when it is cooked through. Use a slotted spoon to check for doneness occasionally during frying.
Conclusion
Creating deep fried cheesecake at home is an adventure worth undertaking. With its crunchy exterior encapsulating a creamy center, it's bound to be a hit at any gathering, or even as a special personal treat.
So roll up your sleeves and embark on this delicious culinary journey. The result is a mouthwatering dessert that tantalizes the senses and brings joy to every bite.
Recipe Card

Sweet and Fluffy Japanese Dorayaki Delights
Ingredients
Method
- Prepare the batter by combining dry ingredients.
- In a separate bowl, whisk the wet ingredients.
- Combine the dry and wet ingredients to form a batter.
- Let the batter rest for about 30 minutes.
- Heat a non-stick skillet over medium heat and grease lightly with butter.
- Pour a ladleful of batter onto the skillet for each pancake.
- Cook until both sides are golden brown and fluffy.
- Assemble the dorayaki by filling with anko.
- Serve warm or at room temperature.
Notes
Additional serving suggestions: pair with a crisp salad, garlic bread, or roasted seasonal vegetables for balance.
For make-ahead, prep components separately and assemble just before heating to preserve texture.
Taste and adjust with acid (lemon/vinegar) and salt right at the end to wake up flavors.