Introduction
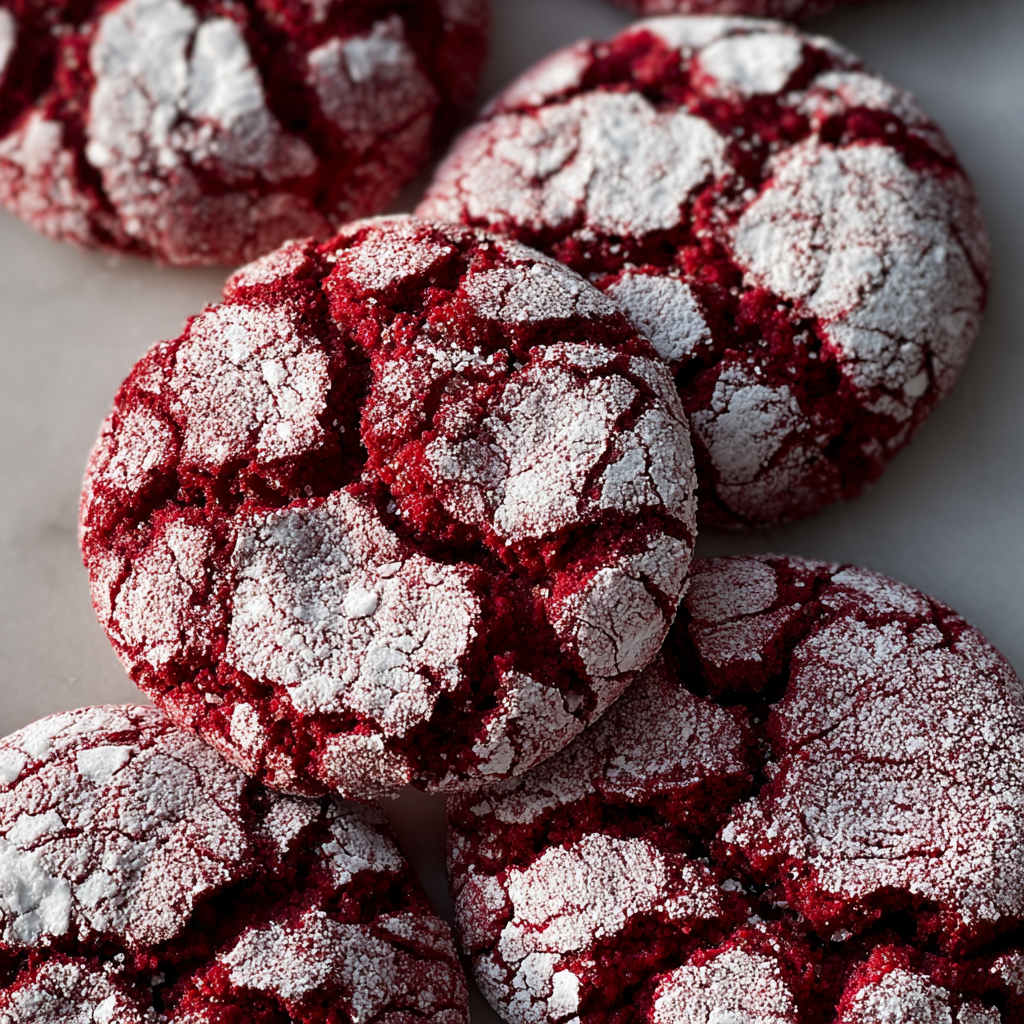
Red Velvet Crinkle Cookies are a delightful twist on the classic red velvet cake, bringing the lushness of its flavor into a convenient, bite-sized treat. These cookies are not only visually stunning with their vibrant red color and powdered sugar dusting, but they also promise a rich taste and chewy texture that will satisfy any sweet tooth.
With their crinkled tops and soft centers, these cookies offer a beautiful contrast that makes them perfect for special occasions or simply to brighten your day. The combination of cocoa powder and buttermilk gives them a distinct flavor that sets them apart from regular cookies, making them an indulgence worthy of a celebration.
Ingredients
- 2 cups all-purpose flour
The base of the cookies, all-purpose flour provides the necessary structure. It helps create a balanced texture that is both chewy and soft. - 2 tablespoons cocoa powder
Cocoa powder brings a subtle chocolate flavor that enhances the red velvet taste while contributing to the cookies’ rich color. - 1 teaspoon baking powder
This leavening agent allows the cookies to rise slightly and achieve a soft, puffy texture, ensuring they don't become overly dense. - 1/2 teaspoon salt
Salt enhances the flavors of chocolate and sugar, balancing the sweetness and bringing out the overall richness of the cookies. - 1/2 cup unsalted butter, softened
Butter not only adds flavor but also provides moisture and contributes to a tender texture, making the cookies chewy rather than dry. - 1 cup granulated sugar
Sugar is the main sweetener, creating a wonderful sweetness and aiding in the cookies' delightful texture. It also helps in achieving that crinkled appearance. - 1 large egg
Eggs bind the ingredients together, providing structure and moisture to the final product, ensuring a chewy consistency. - 1 teaspoon vanilla extract
Vanilla adds a warm flavor that complements the cocoa and enhances the sweetness of the cookies. - 1 tablespoon red food coloring
This ingredient is essential for achieving the signature bright red hue of red velvet. It doesn't affect the flavor but is crucial for aesthetics. - Powdered sugar, for dusting
The powdered sugar coating gives the cookies their crinkle effect once baked, while also adding a touch of sweetness to the final presentation.
Directions & Preparation
Step 1: Preheat the oven to 350°F (175°C).
Preheating your oven ensures an even baking temperature, which is crucial for proper cookie texture. This step shouldn’t be rushed; allowing the oven to reach the correct temperature helps achieve that desired crinkle.
Step 2: In a medium bowl, whisk together the flour, cocoa powder, baking powder, and salt.
Whisking the dry ingredients allows for uniform distribution of leavening agents and flavorings. This is vital for ensuring that every cookie bakes evenly, avoiding any unintentional clumps.
Step 3: In a large bowl, cream the softened butter and granulated sugar until light and fluffy.
Creaming incorporates air into the butter and sugar, helping to achieve a lighter texture in the cookies. It’s important to do this for about 2-3 minutes, so they expand properly while baking.
Step 4: Add the egg, vanilla extract, and red food coloring to the butter mixture; beat until well combined.
This step incorporates the wet ingredients into the mixture, ensuring the cookies have a consistent color and flavor throughout. It’s essential to mix until fully blended for the best results.
Step 5: Gradually mix in the dry ingredients until just combined, being careful not to overmix.
Overmixing can lead to tough cookies, as it activates gluten in the flour. Combine the ingredients just until no flour pockets remain for the best texture.
Step 6: Chill the dough in the refrigerator for at least 30 minutes.
Chilling isn't just beneficial for texture; it also helps cookies retain their shape during baking by solidifying the fat. This step can prevent spreading, yielding a thicker, chewier cookie.
Step 7: Scoop tablespoon-sized balls of dough and roll them in powdered sugar until well coated.
Rolling in powdered sugar not only gives a lovely, snowy appearance but also contributes to the crinkle effect as the cookies bake. Ensure they’re coated evenly to get the best look.
Step 8: Place the dough balls on a parchment-lined baking sheet, spacing them about 2 inches apart.
Spacing is critical; cookies spread while baking, and you want them to have room to expand without melding together. A parchment-lined sheet helps with easy removal afterward.
Step 9: Bake for 10-12 minutes, or until the tops appear crinkled and set.
Baking time is crucial; every oven is different, so check for the tell-tale crinkle. Overbaking will lead to dry cookies, while underbaking will leave them too soft.
Step 10: Allow the cookies to cool on the baking sheet for 5 minutes before transferring them to a wire rack.
Cooling on the sheet allows them to firm up slightly; transferring too soon can lead to breakage. This step is key in achieving a perfect texture.

Why Red Food Coloring Matters
The vibrant red hue of Red Velvet Crinkle Cookies is essential to their identity. The food coloring not only enhances visual appeal but also evokes the classic red velvet cake experience. While some may opt for natural alternatives, traditional red food coloring delivers the signature brightness that's synonymous with this cookie variety.
The Science Behind Chilling Dough
Chilling cookie dough is a step often overlooked but plays a significant role in the final texture. It firms up the fat and helps prevent excessive spreading during baking, resulting in thicker cookies. Additionally, resting allows the flour to fully absorb moisture, which can further enrich the flavor and texture.
Crinkle Effect Explained
The crinkly tops of these cookies are not merely for aesthetics; they are indicative of the baking process. The powdered sugar coating creates a stark contrast as it cracks during baking, revealing the intense red underneath. This not only contributes to the cookies' visual allure but also enhances the overall eating experience with their delightful chewy texture.
FAQs
What if the cookie dough is too thick?
If your dough seems overly thick, consider gently adding a splash of milk or water to moisten it. However, be cautious not to increase the stickiness too much, as that can affect texture.
Why did my cookies not spread?
Cookies may not spread if your dough was too cold when baked or if it was over-chilled. Ensure it’s chilled just enough for easier handling, and let it sit at room temperature for a short time before baking.
Can I use less sugar without compromising texture?
Reducing sugar might affect the chewiness and sweetness of the cookies. If you're looking to cut sugar, consider decreasing it gradually and balancing with an extra tablespoon of butter.
What if the cookies taste bland?
If the cookies lack flavor, consider increasing the amount of cocoa powder or adding a pinch of espresso powder to enhance the chocolate notes. Adjusting vanilla extract can also amplify the overall richness.
How can I add nuts or chocolate chips?
To incorporate extras like nuts or chocolate chips, gently fold them into the dough after mixing in the dry ingredients. Be mindful of keeping a balance so the cookies bake properly.
What happens if I overbake the cookies?
Overbaking will lead to dry, hard cookies. Keep an eye on them during the final minutes to pull them out just when they’ve set to avoid a disappointing texture.
Conclusion
Red Velvet Crinkle Cookies are an impressive yet approachable dessert that can brighten up any gathering. With their beautiful crinkle tops and rich flavor, they strike a balance between elegance and comfort, making them a favorite for many.
Whether enjoyed with a glass of milk or gifted to friends, these cookies will surely leave a lasting impression. Embrace the joy of baking, and allow these delightful treats to bring smiles to your home.
Recipe Card

A Deliciously Romantic Cake for Valentine’s Day
Ingredients
Method
- Preheat the oven to 350°F (175°C).
- Grease and flour two 9-inch round cake pans.
- In a large bowl, whisk together the dry ingredients: flour, sugar, cocoa powder, baking powder, baking soda, and salt.
- In another bowl, combine the eggs, buttermilk, oil, and vanilla. Whisk until well blended.
- Gradually add the wet mixture to the dry ingredients, mixing until just combined.
- Fold in the strawberry purée gently.
- Divide the batter evenly between the prepared pans.
- Bake in the preheated oven for 30-35 minutes.
- Allow the cakes to cool in the pans for 10 minutes before transferring to a wire rack.
- While the cakes cool, prepare the frosting by beating together the powdered sugar, cocoa powder, and heavy cream until fluffy.
- Place one cake layer on a serving plate and spread a layer of frosting on top.
- Top with the second layer and frost the top and sides of the cake.
- Garnish with fresh strawberry slices on top.
- Slice and serve to your loved ones!
Notes
Additional serving suggestions: pair with a crisp salad, garlic bread, or roasted seasonal vegetables for balance.
For make-ahead, prep components separately and assemble just before heating to preserve texture.
Taste and adjust with acid (lemon/vinegar) and salt right at the end to wake up flavors.